
Making your own garden insect-friendly and rich in structure should be close to the heart of every insect lover. Many valuable measures can also be taken in garden maintenance to protect and promote native insect and animal species. The following principle applies:
Less is more - in terms of your own workload. The more that is left standing and lying around in the garden, the more inviting it becomes for our little neighbours.
Here are some recommendations:
If you only mow your lawn once or twice a year, more plants will be able to flower. It is also worthwhile leaving out an area of the lawn for regular mowing. This allows you to create a refuge for insects.
Simply leave faded plants standing over the winter. Standing structures, such as faded sunflower plants, offer attractive winter quarters for many insect species.
Instead, pile it up in a sheltered place so that hedgehogs and the like can find a place to retreat to.
These often have a toxic effect and lead to the death of many insects. By avoiding the use of synthetic fertilisers, you support the establishment of native plants that prefer nutrient-poor locations and thrive on fertilised areas under too much fertiliser.
Not able to assert themselves under competitive pressure
Wild plants such as stinging nettle and goutweed are important food plants for many insects.
Stones can be important refuges for warmth-loving species such as spiders, beetles and bumblebees. Reptiles such as slow worms and small mammals such as birds and hedgehogs also benefit. Regardless of whether the stones
Whether they are arranged to form beautiful herb spirals or dry stone walls or are simply a wild heap - both fulfil the same purpose for the animals. Nocturnal insects use the piles of stones to
to hide from intrusive predators during the day. The spaces in between can also serve as important nesting sites for various species.
In addition, the cairns or walls can have their very own microclimate and thus provide an important habitat. The cavities in dry stone walls in particular are very warm and dry, which is favoured by some insects.
Building instructions:
A simple pile of stones can be built in no time at all. You can simply buy or collect stones of different sizes and pile them up in a pile in a sunny and sheltered place. It is a good idea to use stones that can be found in your region anyway.
Once the stones are in place, they should not be altered if possible so as not to disturb or even injure possible inhabitants. If possible, a well-developed herbaceous border should be allowed to develop around the pile of stones to make it more attractive to insects. However, the stones should not be overgrown or shaded by larger vegetation or trees. Ideally, a hollow about 80-100cm deep should be dug beforehand, which is then filled with the stones until the pile of stones reaches a height of about 100cm. It is best to cushion the hollow with sand and gravel beforehand to ensure good water drainage.
If you want a more visually appealing option for us humans, a rock wall is a good choice, but it is a little more complex to build, although it fulfils the same function for the insects.
Sources:
www.insekten-leben.atAs at 26/08/2022
https://www.rheinische-kulturlandschaft.de/massnahmen/l2-totholz-ast-steinhaufen-trockenmauern/As at 26/08/2022

Stones can be important refuges for warmth-loving species such as spiders, beetles and bumblebees. Reptiles such as slow worms and small mammals such as birds and hedgehogs also benefit. Regardless of whether the stones are arranged to form beautiful herb spirals or dry stone walls, or whether it is simply a wild pile - both fulfil the same purpose for the animals. Nocturnal insects use the piles of stones to hide from intrusive predators during the day. The spaces in between can also serve as important nesting sites for various species. In addition, the cairns or walls can have their own microclimate and thus provide an important habitat. The cavities in dry stone walls in particular are very warm and dry, which is favoured by some insects.
Building instructions:
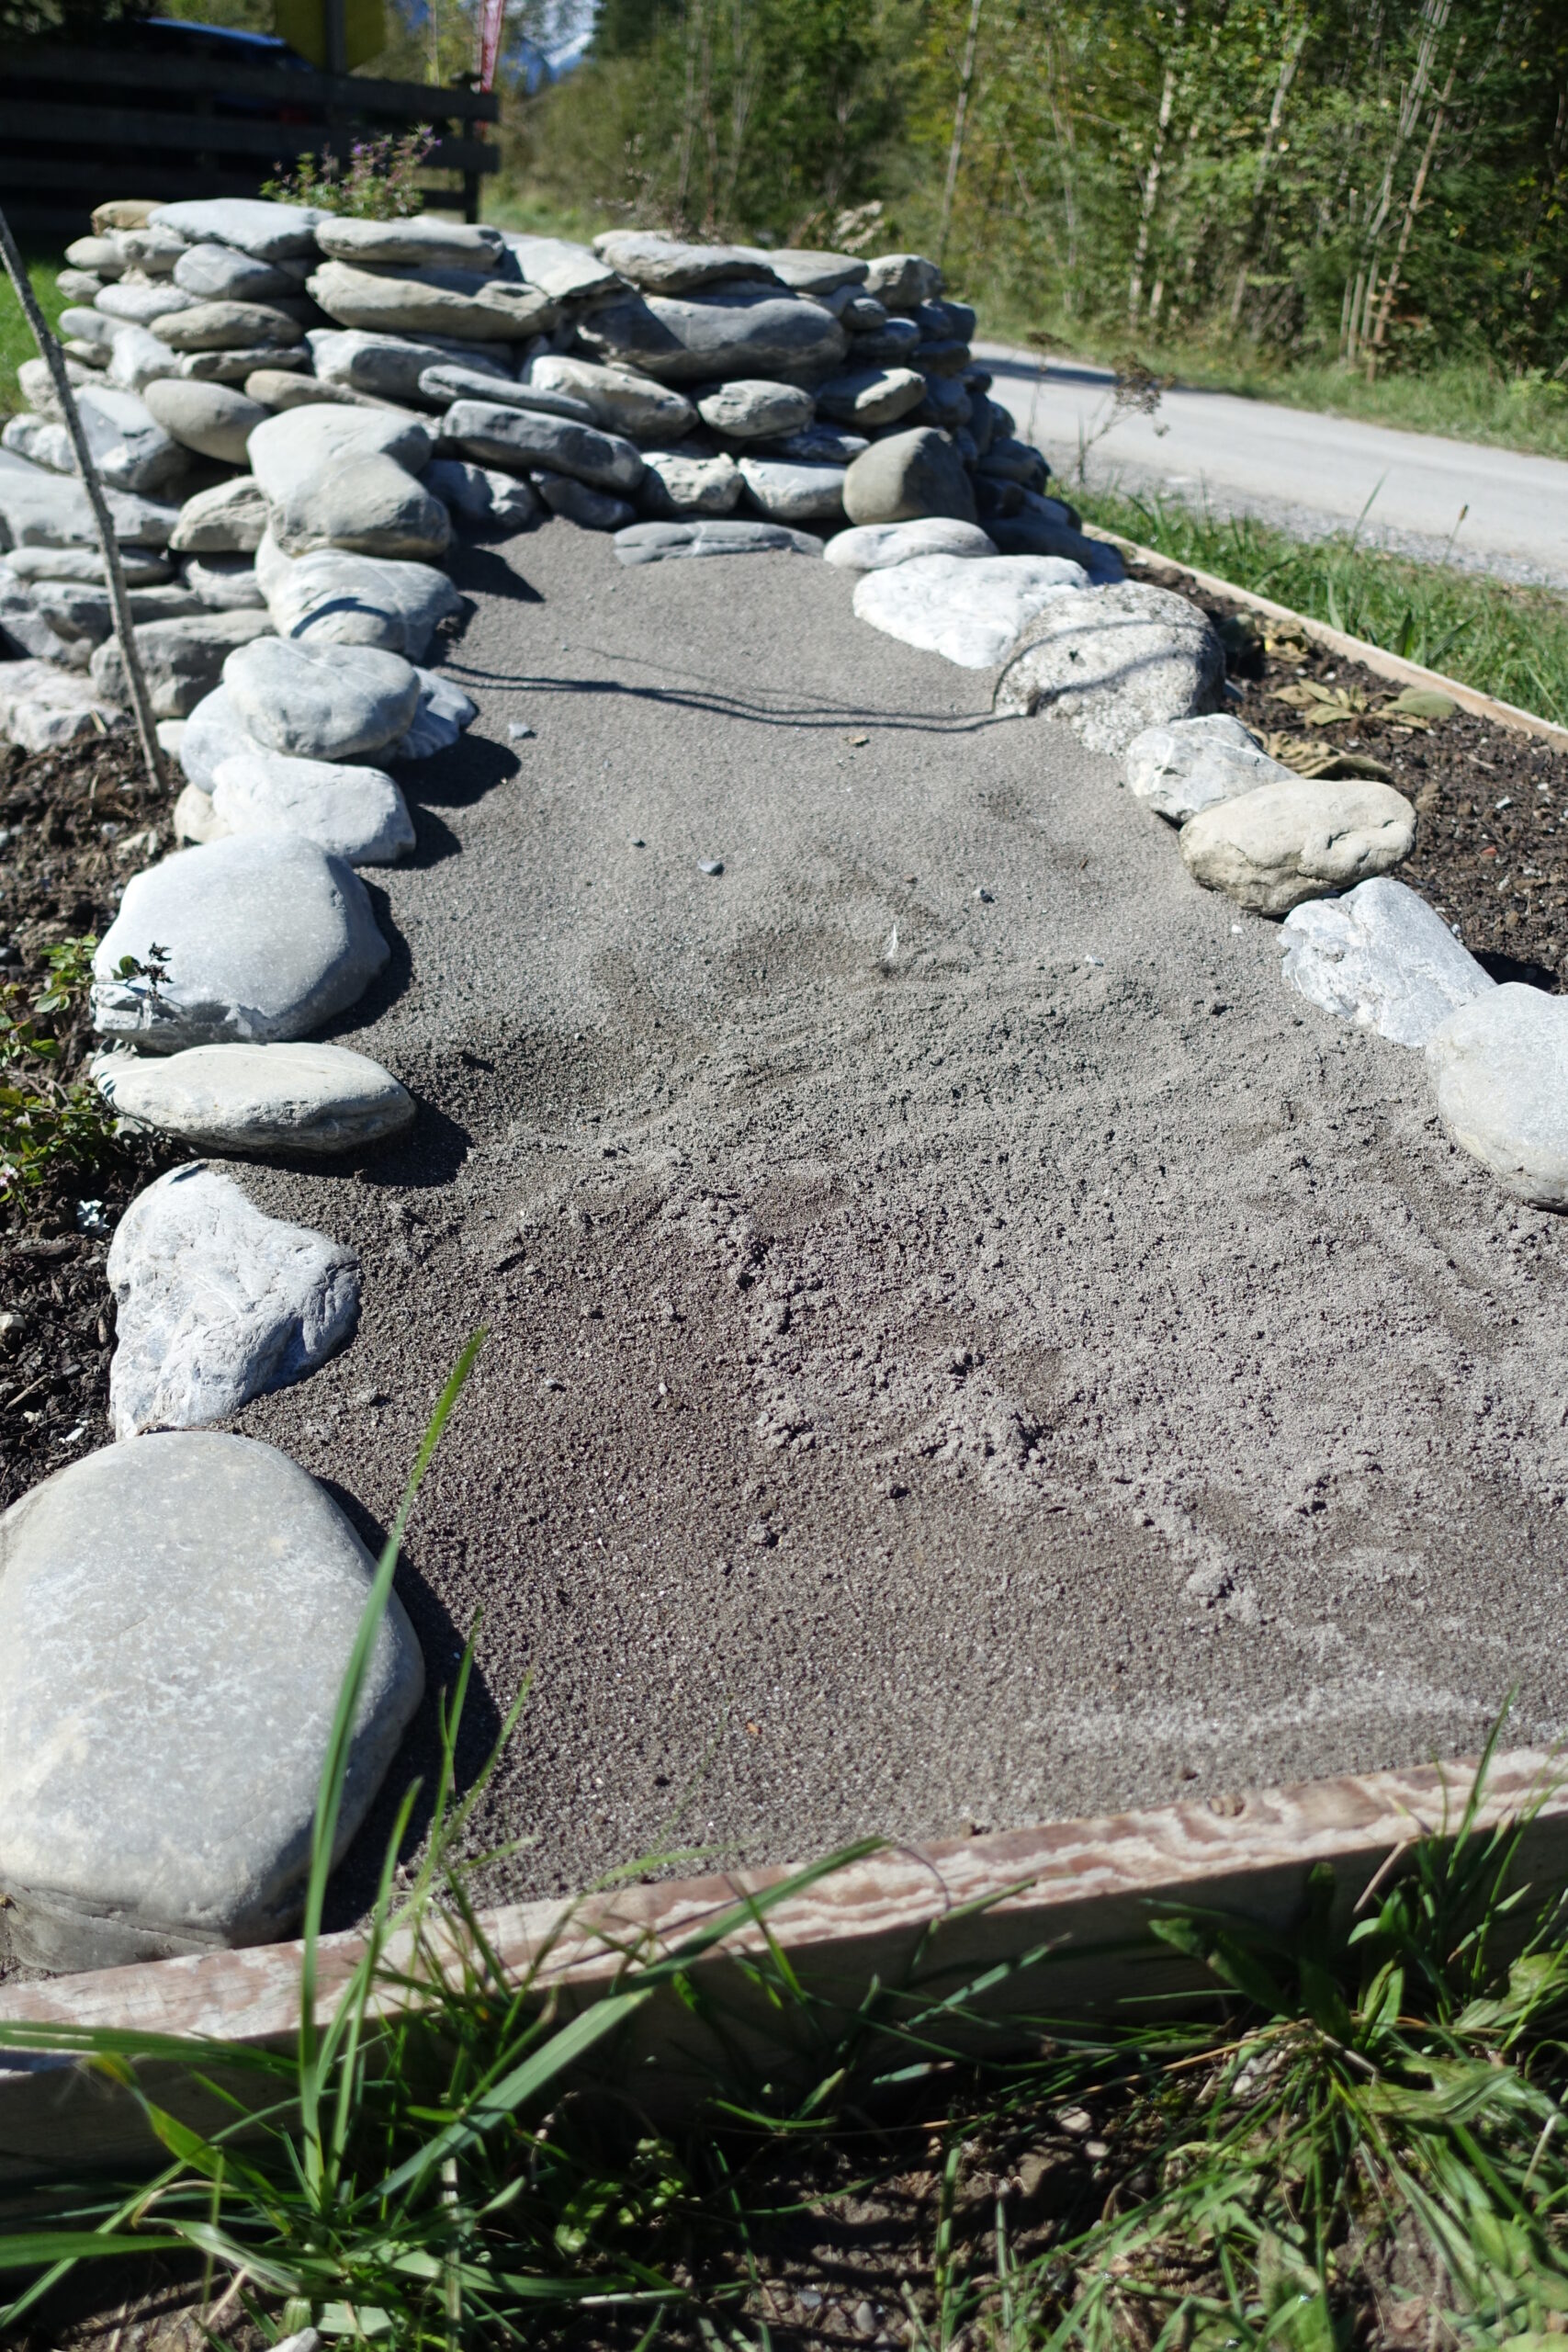
The location of the sandarium should be as sunny and dry as possible. To allow rainwater to run off quickly, the sand area should have a sloping shape or contain a trough in which the water can pool to seep away. The most important thing is the quality of the sand used. As wild bees build their nesting tubes from sand, it must be sticky. Washed sand with a homogeneous grain size, such as that found in the sandpit, is unsuitable here. Different grain sizes are required in the sand, from coarse to fine. Adding loamy or clayey components to the area also favours the colonisation of different wild bees, as the grain sizes required for nest building vary depending on the species. With higher clay content, it is advisable to build a drainage system along the sandarium to support water drainage and prevent waterlogging. To obtain a suitable sand, it is recommended to mix 4 parts finest play sand with 1 part straw-free top plaster clay. It is easy to test whether the sand structure is suitable using the mould test: shape the sand into rolls (or press damp sand into an empty cup and turn it over to dry), if the mould holds together well even when dry, the sand structure is suitable and can be used to build the sandarium. The area of the sandarium should not be too small and should also have a certain depth. To do this, you can simply dig a hollow about 50 cm deep and then fill it with sand. To protect the sandarium from being converted into a litter tray or similar, thorny vines such as brambles or roses can be placed around the outside and to a lesser extent on the sand area. However, care should be taken to leave the majority of the sand area uncovered.
Sources:
https://www.bund-bawue.de/service/meldungen/detail/news/
garden-tip-creating-a-sandarium-for-wild-bees/ 19.08.2022
Westrich, Paul (2015): Wild bees. The other Bees. Published by Dr Friedrich Pfeil, Munich
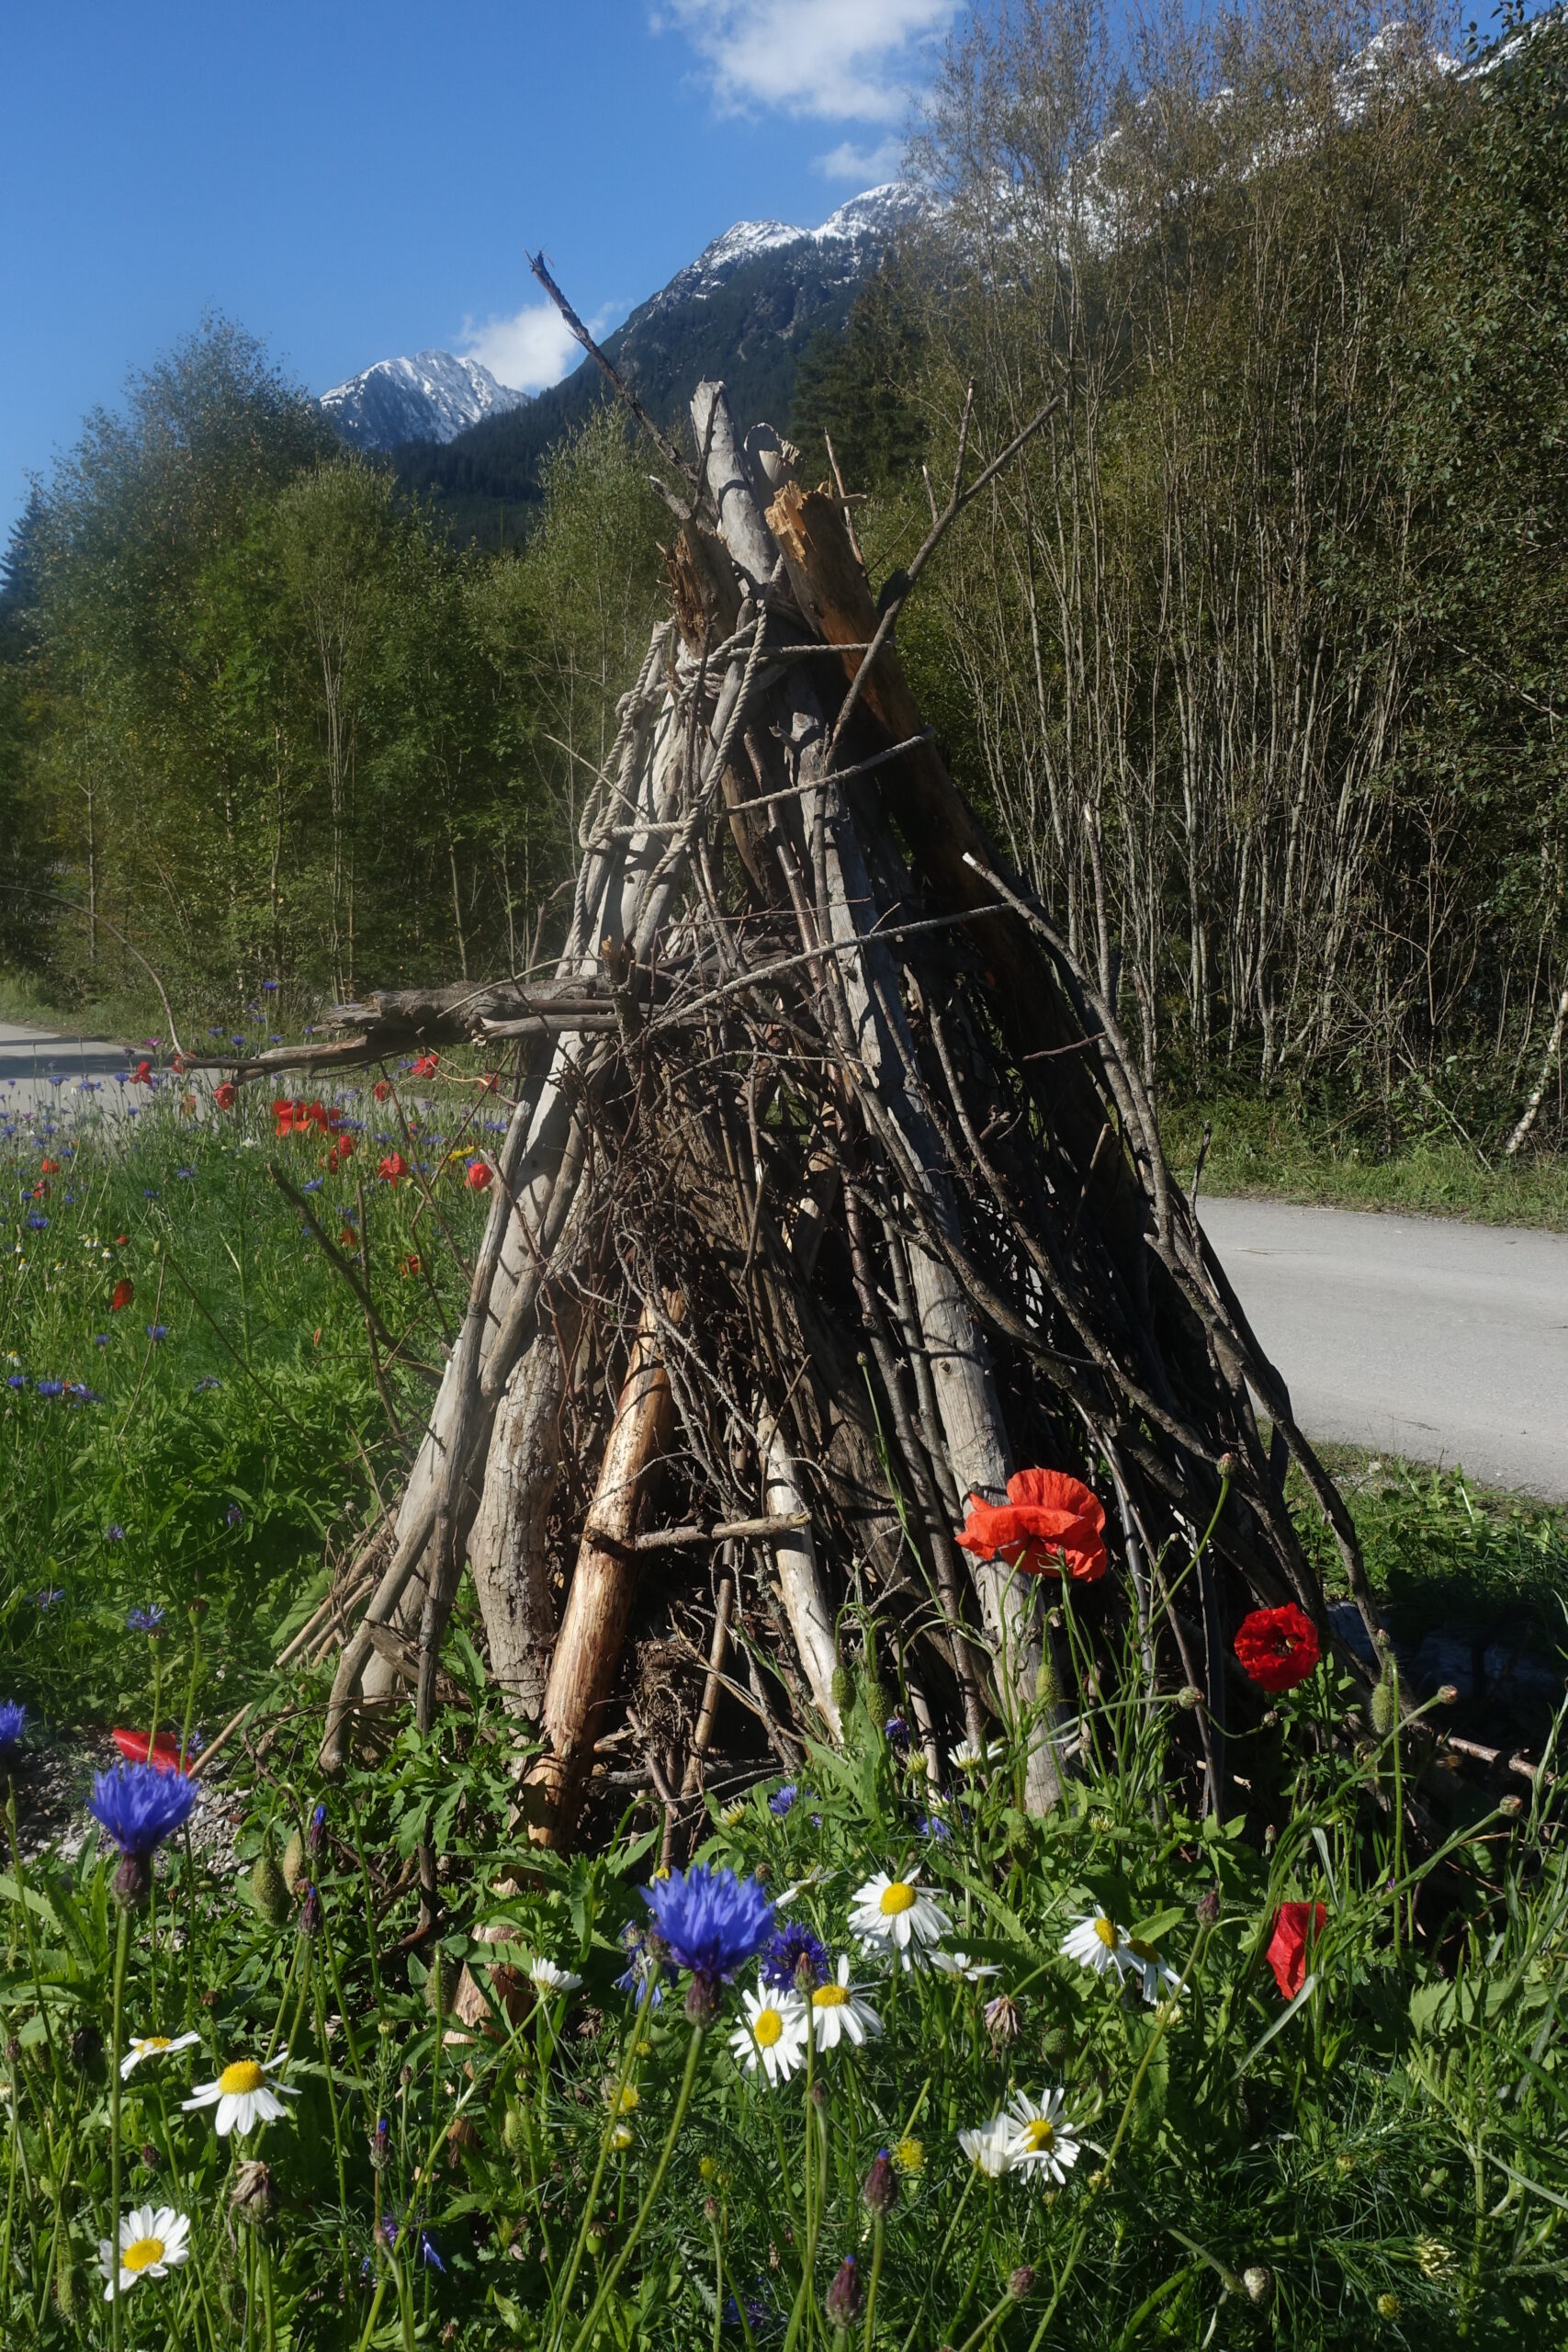
Dead trees, branches, roots or even untreated old timber - as soon as it is left to rot, it becomes a valuable habitat for a variety of organisms. Not only fungi, lichens
and mosses feel right at home on it. Various insect and bird species depend on deadwood, whether as food, hiding places or building material. The key feature is that deadwood is allowed to remain in place for many years or decades and decompose completely. Only in this way can many
species can establish themselves on the decomposing wood and succession processes can get underway. Eventually, mulm and humus can form, the decomposition products of the wood, which serve as habitat and food for animals, soil life and plants. Deadwood also characterises the river area. In addition to its existence as a microhabitat, it also has an effect on the morphology, hydrology and material composition of the watercourse. The increased flow diversity due to deadwood has a positive effect on the species composition in the watercourse, as a greater range of different habitats, such as break-off edges, is created.
A hint!
The branches left lying around over the winter, which are then burnt in the bonfire in spring, are therefore NOT deadwood in the ecological sense. On the contrary, there is a risk that animals that have already moved in, such as hedgehogs or common toads, will no longer be able to find an escape route and will also be burnt. The following therefore applies:
If the pile of wood is to end up in the fire, it must be restacked beforehand so that the animals can still escape.
Building instructions:
This structural element can also be easily offered to the animals that live in your garden. To do this, you can simply leave any leftover wood in a quiet place in the garden, ideally for several years. The location of the deadwood - whether sunny, shady, dry or moist - also determines the species that colonise it. A micro-habitat can quickly develop on a trunk. The type and duration of the decomposition process is also influenced by whether the deadwood is standing or lying, i.e. whether it is in contact with the ground over a large area.
Sources:
https://www.uni-due.de/~iwb010/docs/18.WB-Kurz-Kail12-02-2004.pdf 12. 08. 22
https://www.lbv.de/ratgeber/lebensraum-garten/totholz/ 12. 08. 22
https://www.nabu.de/umwelt-und-ressourcen/oekologisch-leben/balkon-und-garten
/animals/insects/22649.html 12. 08. 22
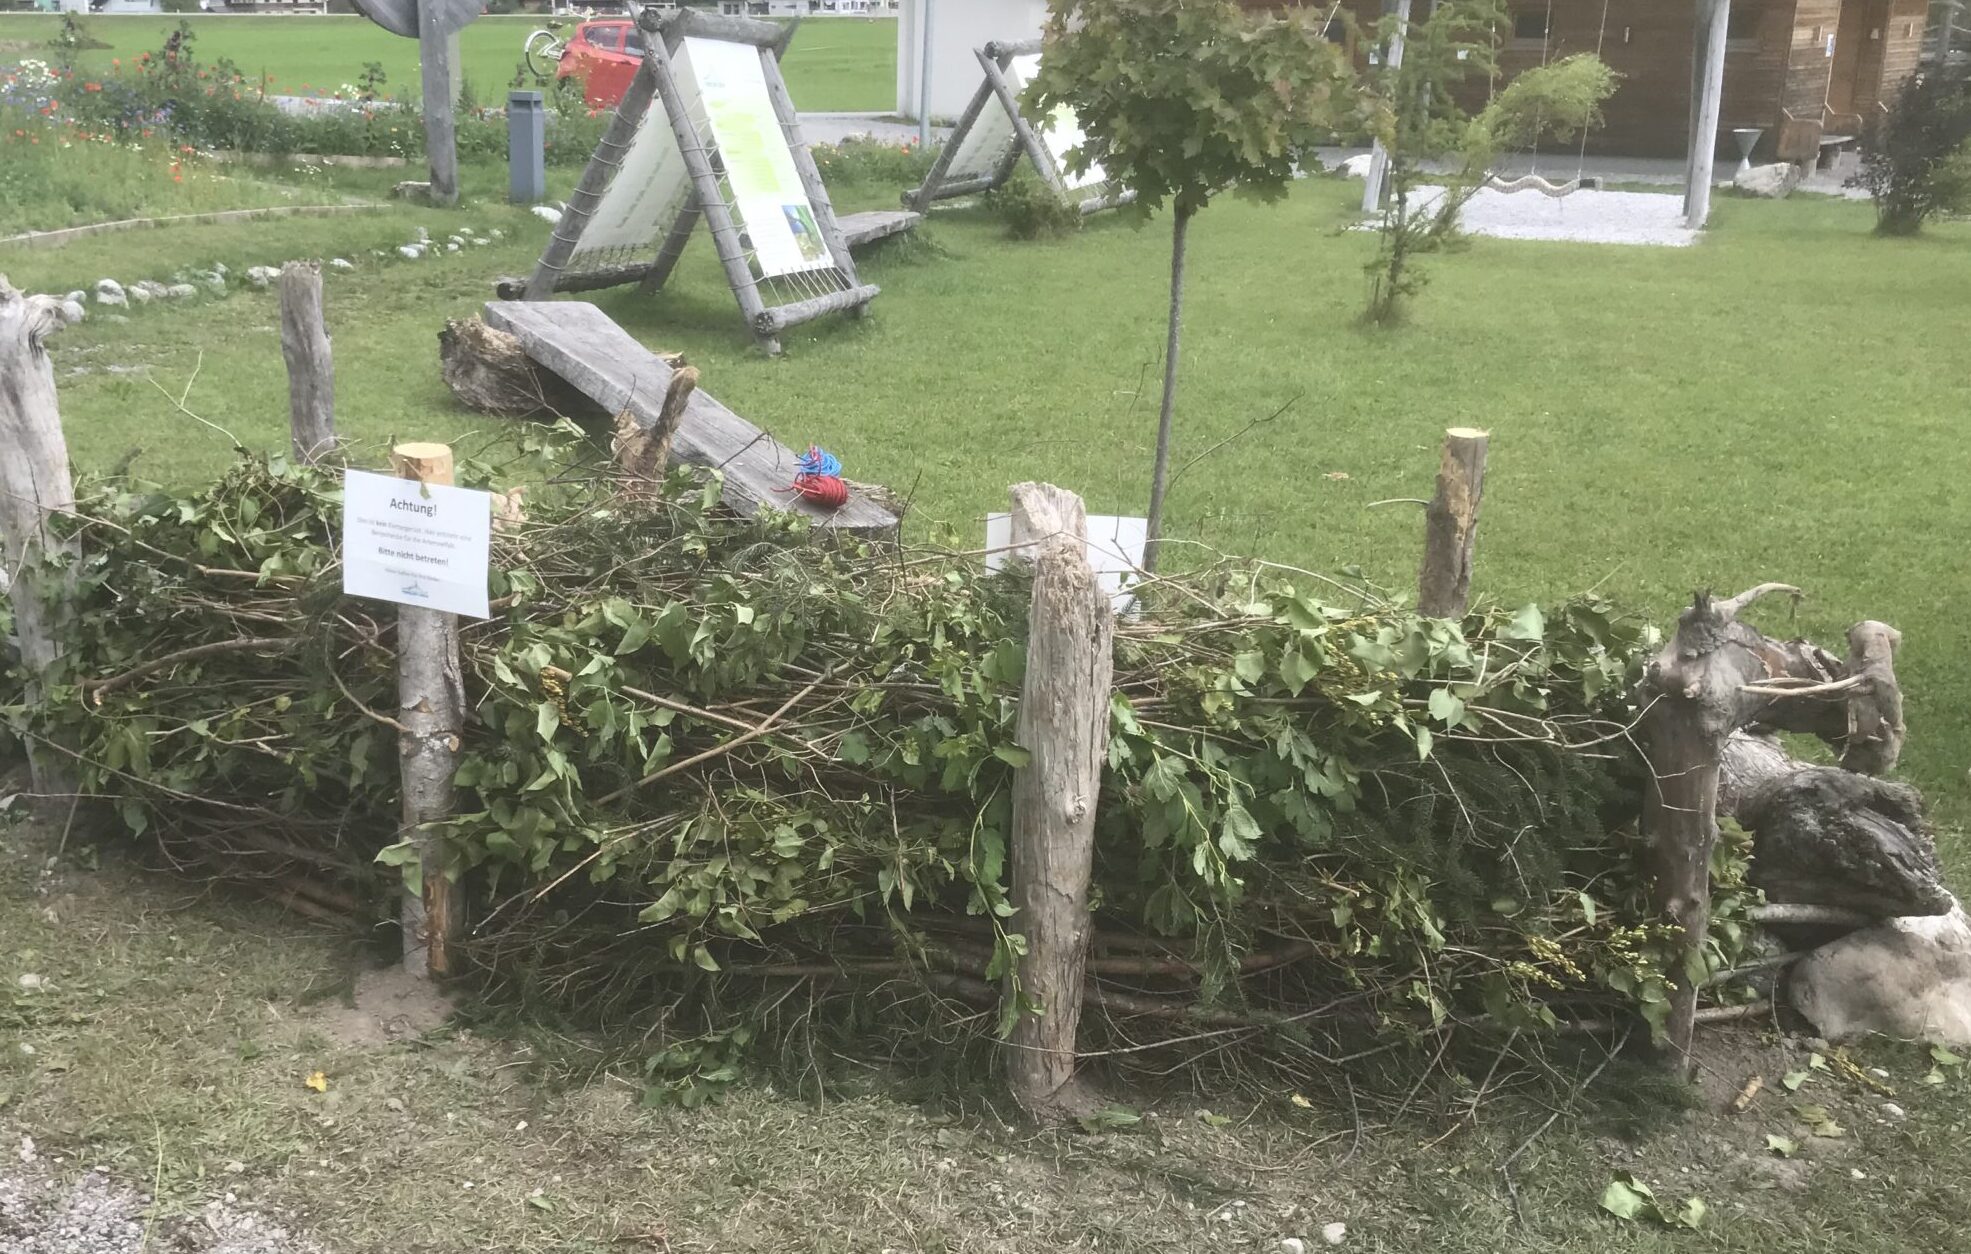
The Benjes hedge is a vertically erected border strip for the garden, which consists of green cuttings, i.e. branches and other herbaceous or woody cut-off materials from the garden. The Benjes hedge is named after its inventor, the landscape gardener Hermann Benjes. However, branch cuttings are predominantly used, which is why it is sometimes referred to as a deadwood hedge. This form of hedge is not only a simple reuse for garden waste, but also provides shelter for many animals: birds; smaller mammals, such as mice or hedgehogs; reptiles, such as sand lizards and wood lizards or grass snakes; amphibians, such as frogs and toads; as well as numerous insects. Once established, the Benjes hedge requires hardly any maintenance. Instead, plants and shrubs can establish themselves in the hedge and stabilise it in the long term.
Important note!
Care should only be taken not to bring in sections of invasive plant species such as Japanese knotweed or Indian balsam. These always belong in the residual waste! The growth of plants such as brambles or nettles, which quickly dominate the hedge and crowd out other plants, should also be controlled.
Building instructions:
Stakes or thicker sticks/branches are rammed vertically into the ground to create the Benjes hedge. The distance between the stakes can vary depending on the filling material. The height of the hedge should be around one metre, but it can also be taller if it is also to serve as a privacy screen, for example. The length and width can be flexibly adjusted depending on the space and amount of filler material. The stakes are then either filled with pruning material straight away or stabilising cross-connections can be added between the stakes. When filling, longer or coarser material such as branches and twigs should be placed on the outside and finer material such as green cuttings or leaves on the inside. Everything is piled loosely on top of each other. The material can also be collected separately to create a Benjes hedge of branches and a pile of leaves in a shady and windless spot. Both will soon be colonised and serve as a valuable habitat. If the material in the Benjes hedge sinks together and rots over time, new material can be piled on top. Rotting material can also be removed from below and added to the garden soil. In this way, the Benjes hedge also serves as a composting plant.
Source:
https://www.ndr.de/ratgeber/garten/Benjeshecke-anlegen-und-Gruenschnitt-kompostieren,
benjeshecke101.html 11. 08. 22
https://www.nabu-xanten.de/nabu-gruppe-xanten/arbeitsgruppen/benjeshecke/ 11. 08. 22
The soil and its nutrient content, also known as humus content, is a decisive factor for the development of vegetation. The majority of our meadows and fields are regularly fertilised and mowed. This displaces plant species that are very well adapted to nutrient-poor sites. However, these are often extremely important for many specialised insect species. The basis of our flowering meadow is therefore the modification of the soil. To do this, the top layer of humus and the dense root system of the sward must be removed. The subsoil is then filled with gravel and a thin layer of soil is spread on top, which results in faster water drainage. It stays dry and warm for longer. This creates a nutrient-poor soil in which typical species of so-called rough pastures can establish themselves. A distinction is also made here between calcareous and siliceous parent rock for soil formation - this influences the pH value of the soil and thus the future species composition. The preparation of a suitable substrate is therefore essential for creating a flowering area.
Building instructions:
Firstly, the old soil is excavated to a depth of approx. 15 cm. The area can be demarcated from the surrounding areas with wooden slats or stones. This can also prevent fast-growing plants, such as dandelions, from migrating from the surrounding areas. The excavated area is then filled with crushed stone to a height of approx. 10 cm Grain size of the crushed stone approx. 1:30 The crushed stone must not be compacted and must not be spread too early before the plants are sown so that it cannot settle. The plants can root better in the loose material. Finally, mix some green compost and soil under the gravel - there is no need to cover the gravel with a layer of humus! Rather, this should be avoided in order to keep the site as lean as possible. The bed is then ready to be planted with suitable species.
Firstly, the old soil is excavated to a depth of approx. 15 cm. The area can be demarcated from the surrounding areas with wooden slats or stones. This can also prevent fast-growing plants, such as dandelions, from migrating from the surrounding areas. The excavated area is then filled with crushed stone to a height of approx. 10 cm Grain size of the crushed stone approx. 1:30 The crushed stone must not be compacted and must not be spread too early before the plants are sown so that it cannot settle. The plants can root better in the loose material. Finally, mix some green compost and soil under the gravel - there is no need to cover the gravel with a layer of humus! Rather, this should be avoided in order to keep the site as lean as possible. The bed is then ready to be planted with suitable species.
Important note!
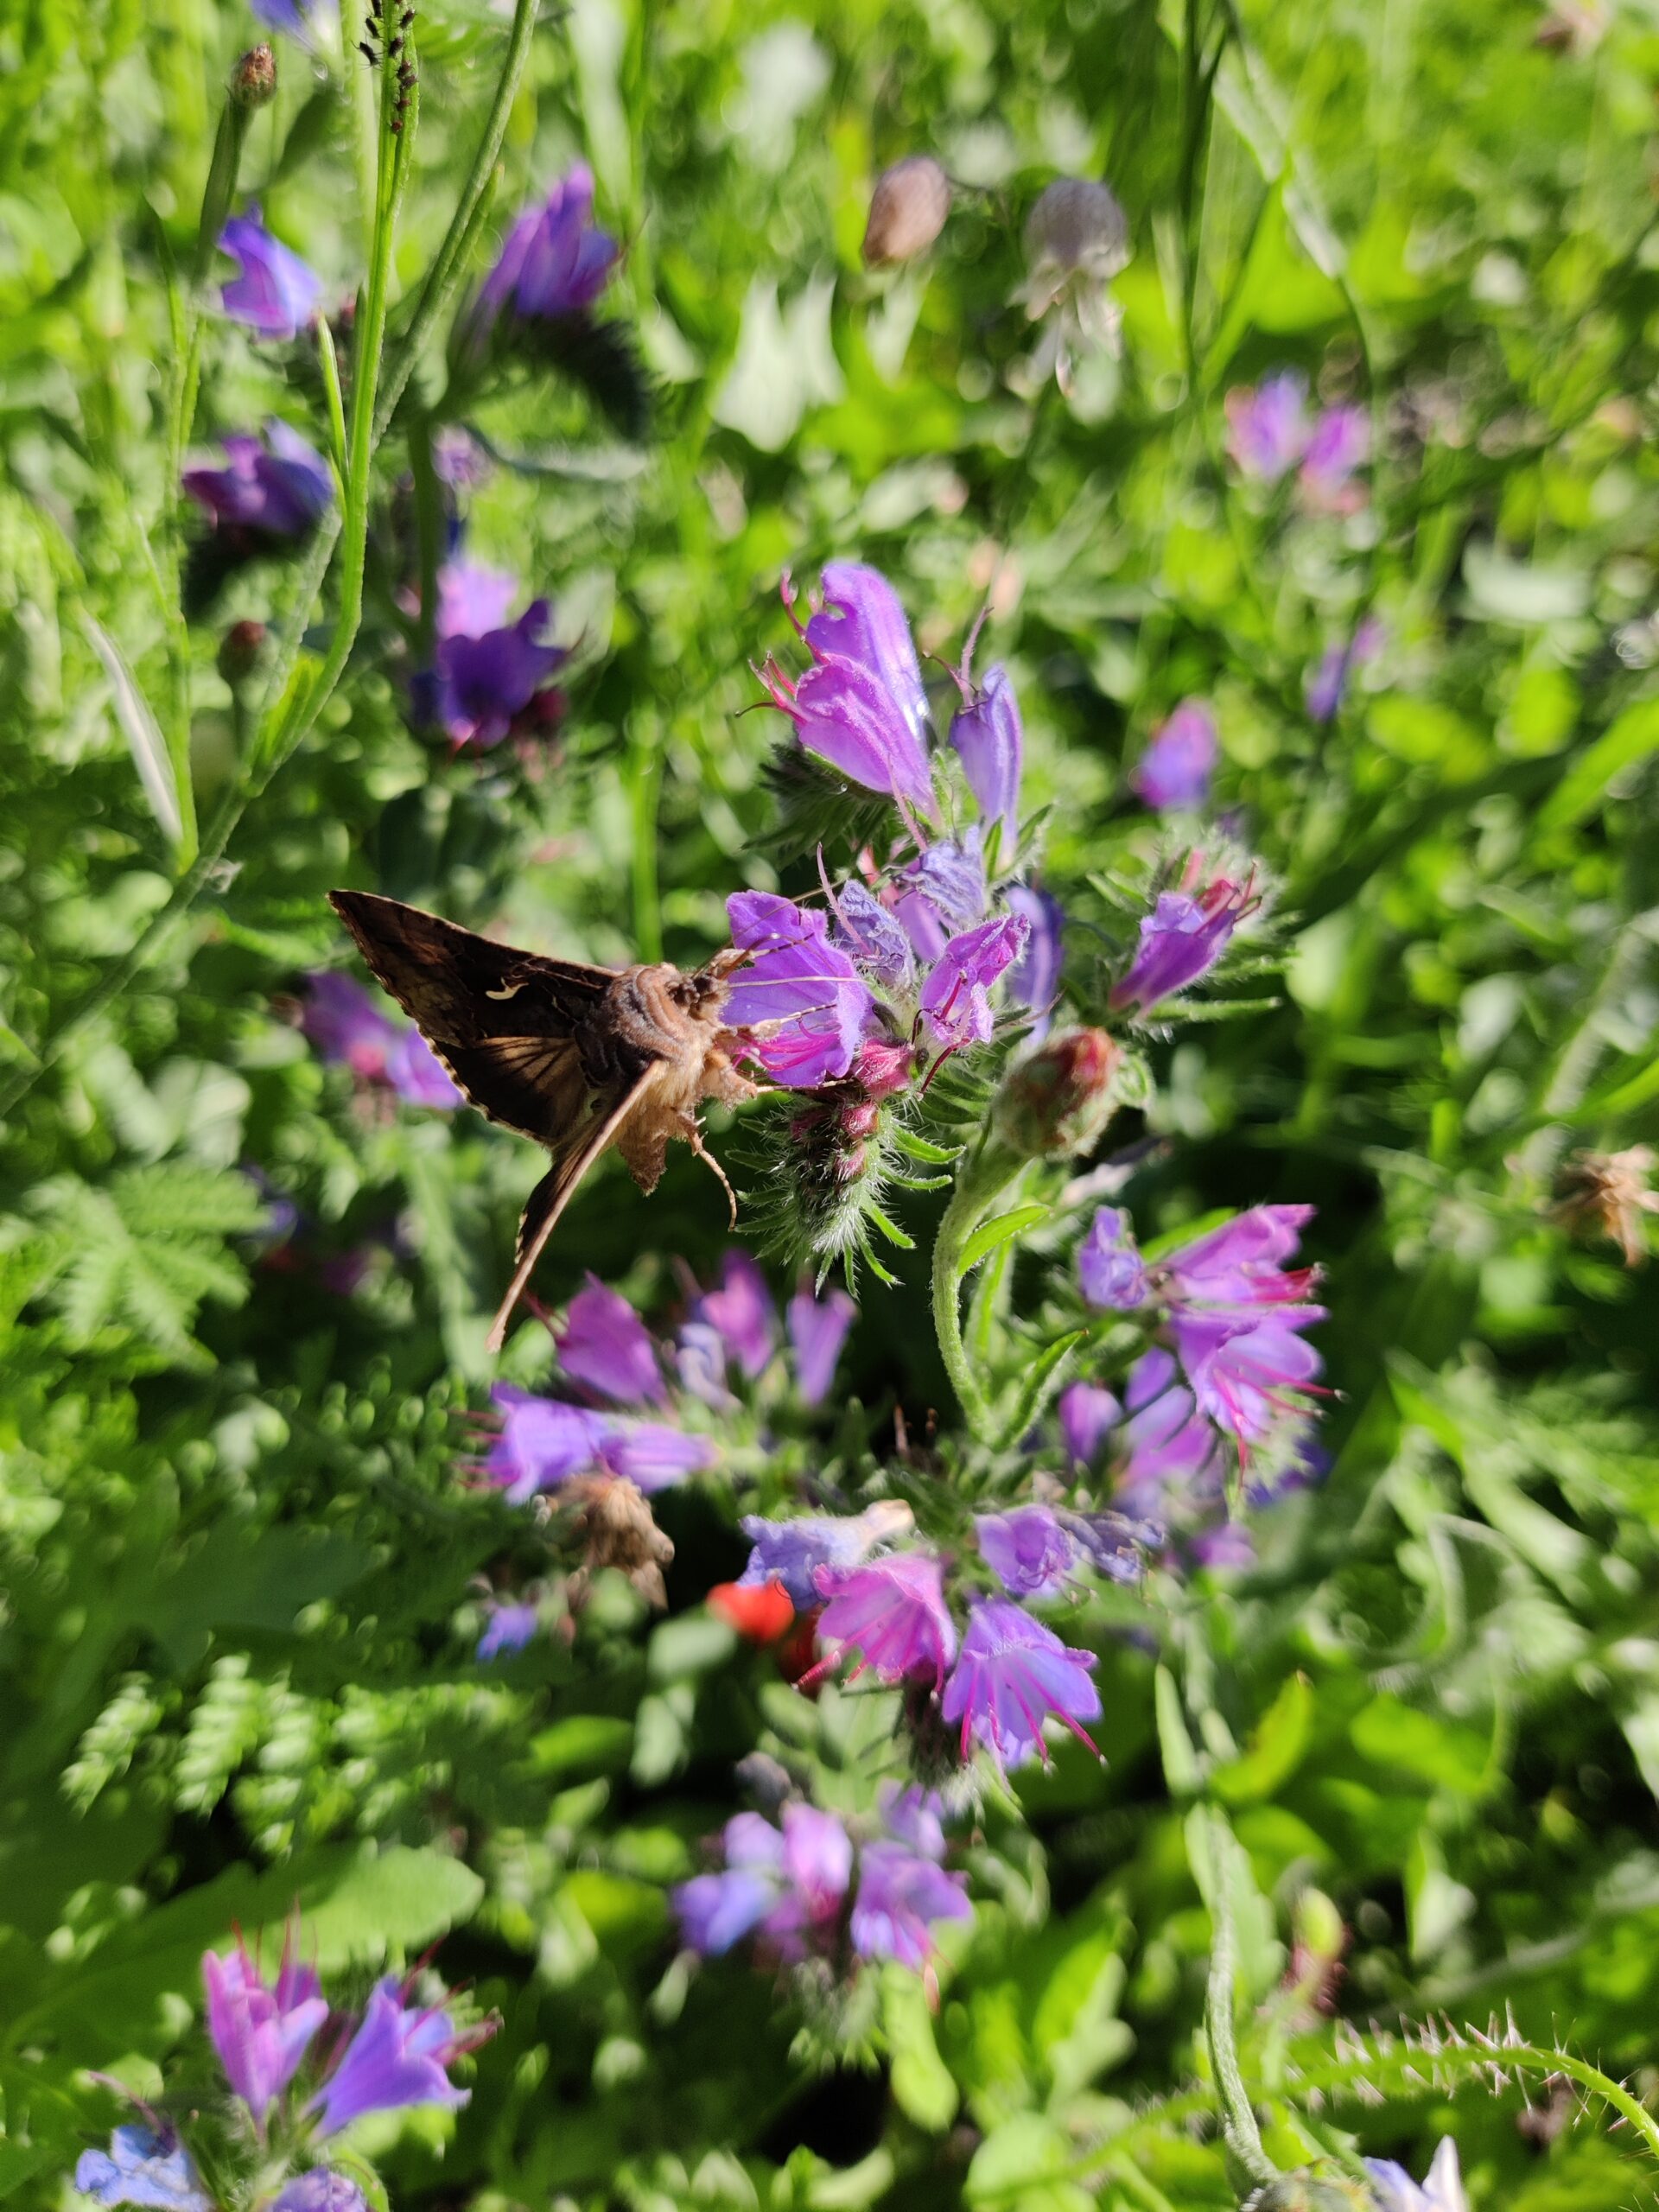
It is important that plants bloom throughout the entire vegetation period from March to November. This is the only way to meet the food requirements of as many insects as possible. The insect's flight times are usually synchronised with the flowering times of the plants it feeds on. For this reason, the planted species should be synchronised in terms of their flowering times. In addition, only native seeds or native plants should be planted in the flowering meadow. Many ready-made flowering mixtures contain flowering plants whose flowers may look colourful and magnificent, but are not very attractive or not at all attractive to native insect species. These plants often have double flowers and low nectar production. Therefore, when buying seed mixtures, pay attention to their species composition. The best thing to do is to go out in autumn and collect seeds yourself. As the flowering meadow grows, it should be mown once or twice a year, ideally from July onwards. The cuttings should not be left on the meadow, but separated and composted for the vegetable patch, for example. This way, the nutrients removed from the meadow can be put to good use straight away.

Insect hotels are a wonderful way to compensate for the increasingly scarce supply of nesting opportunities for wild bees. Nesting aids can be made from a wide variety of materials and in many different ways. Wild bees have very different requirements for their breeding sites, which is why nesting aids usually only appeal to a small range of species. Nevertheless, they can make a small contribution to species conservation, but above all they make it easier to observe the insects and can therefore increase the enjoyment of species conservation. To ensure that an insect hotel is also accepted as a nesting aid, a few important basic rules must be observed during construction.
Basic rules for building a nesting aid:
The easiest nesting aids to build are for species that colonise existing cavities. These can be made from a wide variety of materials. To ensure that an insect hotel is also accepted as a nesting aid, a few important basic rules must be observed during construction. In general, choose a location that is as sunny as possible and ideally south-facing to ensure a warm and dry climate. In addition, the nesting aid should be placed at about chest height so that the energy required to fly in is not too great. A clear flight path also ensures good accessibility to the nesting aid. To ensure that the nesting aid can be accepted by as many different insects as possible, holes of different sizes with a diameter of between 3 and 10 mm and a depth of at least 6 cm (preferably 10 cm) should be provided as breeding cavities. The holes should be sealed at the back so that the passage is completely dark as soon as the front has been closed by the bee. For maximum durability, you can install your insect hotel in a robust housing with a small roof. The filling can then be replaced as the weathering progresses. Impregnated or painted materials should be avoided at all costs, as they contain toxic substances. Moisture-impermeable materials such as plastic or glass tubes or rubber should also not be used. These do not allow water vapour to penetrate to the outside, which means that fungi can quickly colonise the nest box and damage the brood or even cause it to die.
Building instructions:
Here we present some methods that can be easily replicated:
Bamboo tubes and reed stalks
Bamboo canes or reed stalks from the DIY or garden centre can easily be used to make a nesting aid. To do this, cut the culms behind the knots to create shorter pieces that are sealed at the back. The stalks can be carefully hollowed out with a small drill, as some species prefer smooth inner walls. However, other species remove the pith from the stems themselves, so this is not absolutely necessary. The stalks should then be stored horizontally and protected from the rain, for example by placing them in an old tin can.
Hardwood with drill holes
Nesting aids can also be built by drilling holes in a piece of hardwood with a drill. It is important not to use softwood or coniferous wood, as this is more likely to crack as it dries. If the drill holes become cracked, sharp wood fibres can stand up and injure insects. In addition, predators can enter the nest cavities through cracks. Coniferous wood is also unsuitable because of the resin that can stick to it. When drilling, it is also very important to only ever drill into the longitudinal wood (i.e. from where the bark was originally) as otherwise cracks can easily occur, making the holes unusable for the bees. Care should be taken to drill clean holes and the edges should be smoothed afterwards, e.g. with sandpaper, so that the insects do not injure themselves on splinters or wood fibres.
Other materials that are suitable for building a nesting aid would be a block of clay with holes drilled in it, drilled solid bricks or interlocking tiles. As some species also prefer vertical stems, it is a good idea to leave the withered remains of hollow or pithy stems (e.g. elderberry, bramble, mullein, reeds, etc.).
Sources:
https://diesummer.de/insektenhotel/ 25.08.22
Westrich, Paul (2015): Wild bees. The other Bees. Published by Dr Friedrich Pfeil, Munich
Photos by Leonie Jonas